Iris Colour Detection with Raspberry Pi
Official announcement republished verbatim (not rewritten or translated); source linked on this page.(Original language:English)

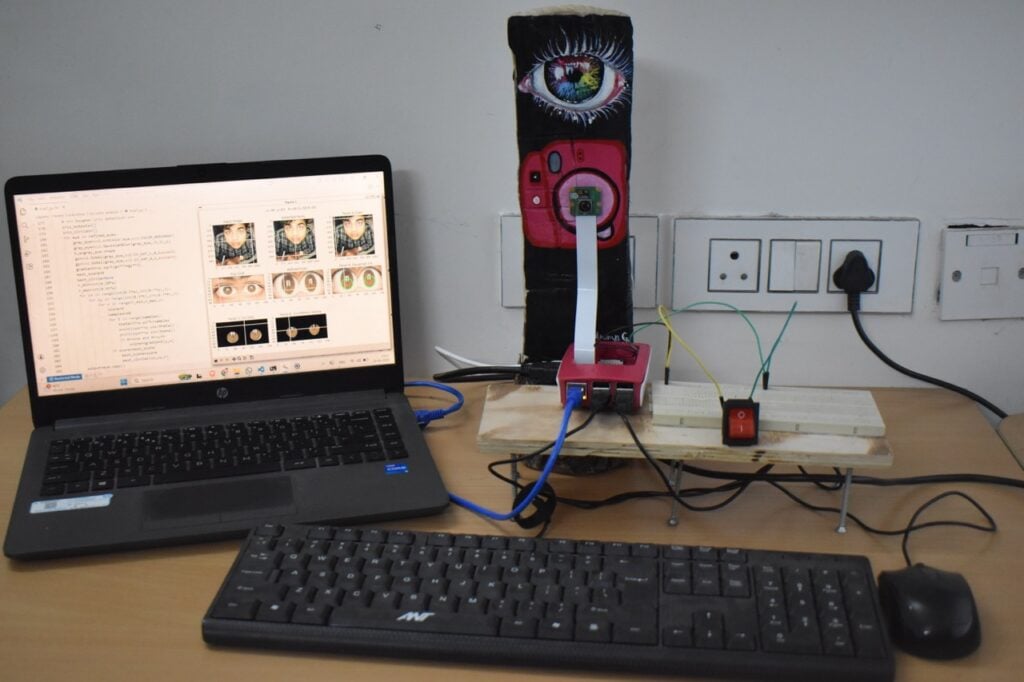
This Maker Monday , a project with potential for clinical applications caught our eye. A Raspberry Pi 3 Model B+ and a Raspberry Pi Camera Module 3 use OpenCV to determine the colour of the iris looking into the camera.
For the majority of people, just checking in the mirror and recognising your eye colour is fairly simple. Our brains are able to process that information pretty easily. How would a computer do it, though? If you read our magazine, chances are you already have a half-formed answer in your head based around computer vision. Srikrishna Karthick, a student currently working for the Indian Space Research Organisation (ISRO) on their thesis, already has the answer for you.
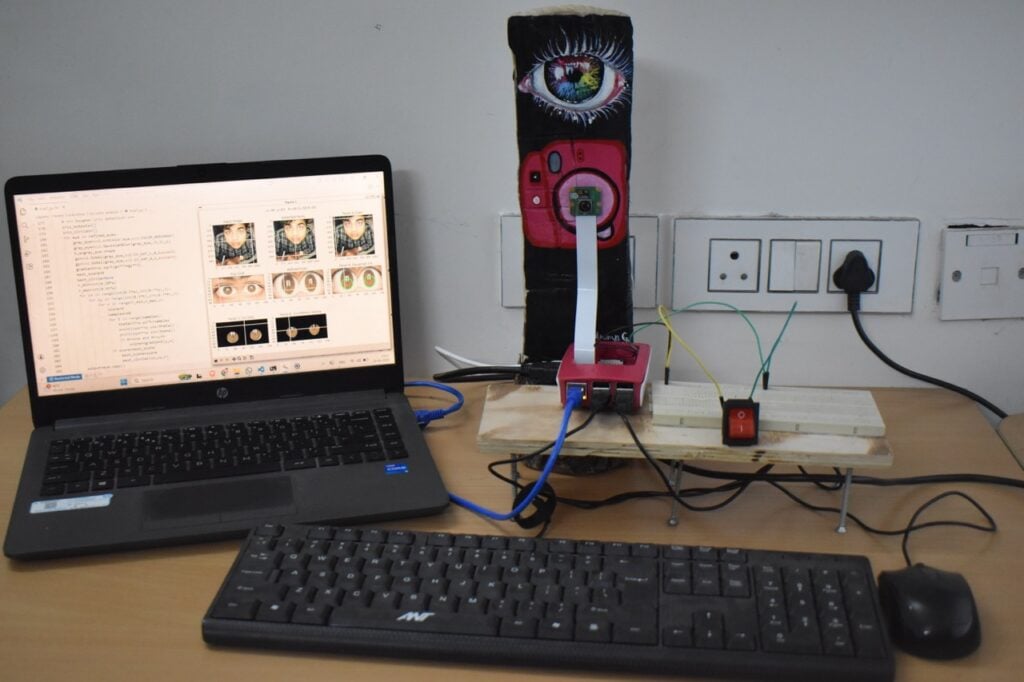
“Every year, the Muscle Physiology Laboratory at IISER Tirupati [in India] participates in National Science Day celebrations by setting up an exhibit alongside other laboratories and student groups,” Srikrishna tells us. “The Muscle Physiology Lab displays fruit flies (Drosophila) with different eye-colour phenotypes, for explaining the genetic mechanisms underlying the inheritance of eye colour. To make the demonstration more engaging and relatable to visitors, it was proposed that the eye colours of attendees could also be recorded and their distribution displayed in real time.”
To avoid a manual tally and manual data analysis, an electronic method was proposed. With an objective to inspire younger students, and a short deadline, Raspberry Pi ended up being the obvious choice.
The build mainly consists of a Raspberry Pi 3 Model B+ and a Raspberry Pi Camera Module 3 . A button — connected to Raspberry Pi’s GPIO header — is pushed, which triggers the capture of a photo that is then handed over to OpenCV for processing.
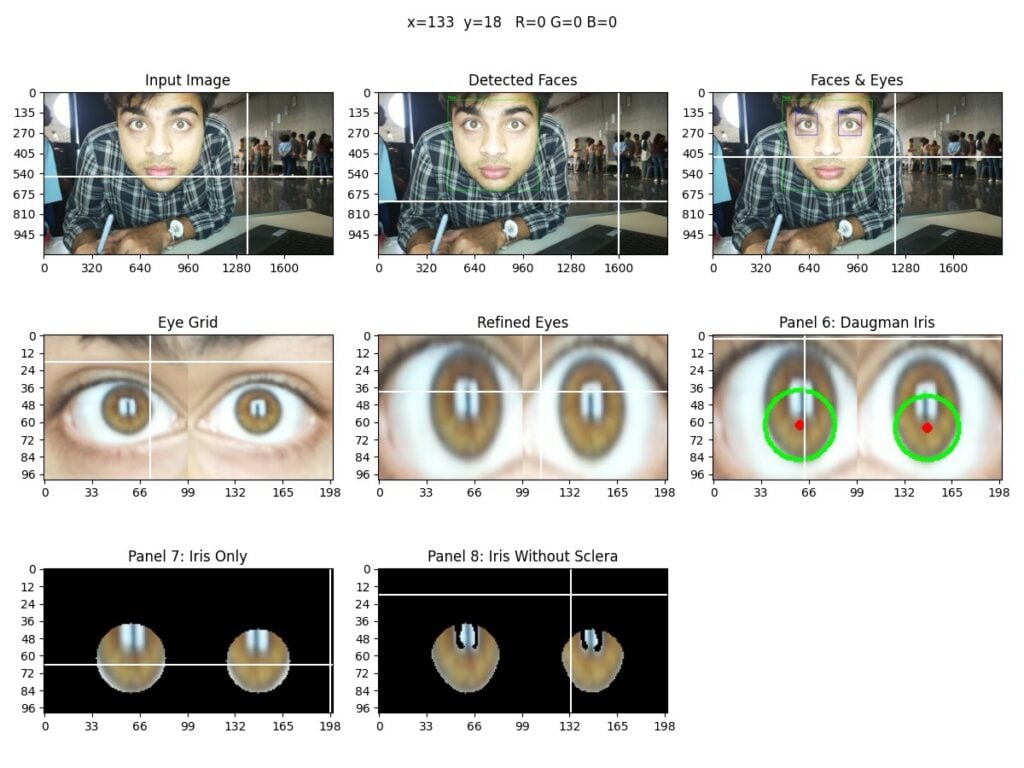
“The captured image is automatically processed to detect the subject’s face and eyes using OpenCV Haar cascade classifiers,” Srikrishna explains. “Once the eye region is identified, the iris is localised using a Daugman-inspired circular gradient search algorithm that estimates the iris boundary.”
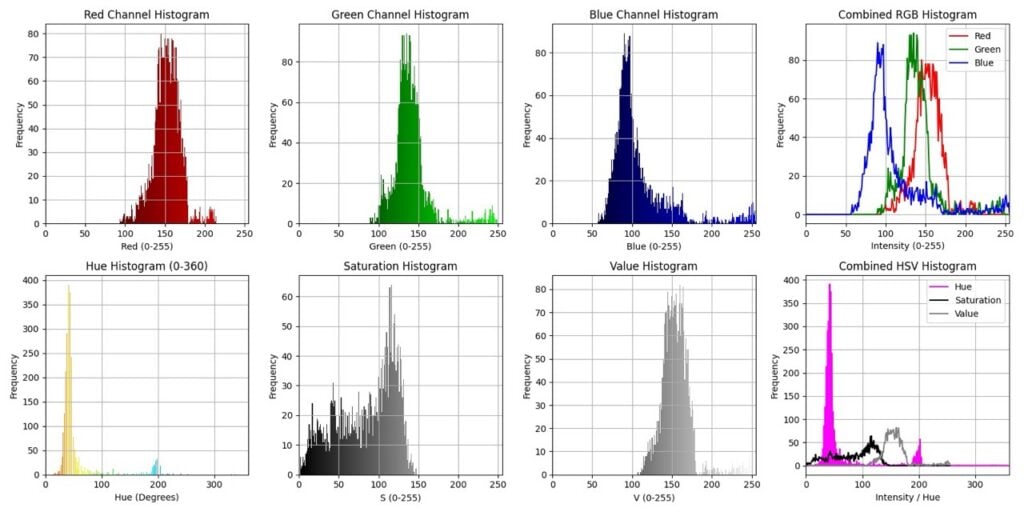
“Pixels contained within the detected iris region are extracted, while non-iris areas such as the sclera are removed through brightness and saturation-based filtering. Colour information is subsequently analysed using both RGB and HSV colour histograms. To determine the dominant iris colour, k-means clustering is performed on the extracted iris pixels in both RGB and HSV feature spaces, and the largest cluster is selected as the representative iris colour. Finally, the dominant colour is classified into categories such as dark brown, brown, light brown, blue, green, amber, or grey using predefined HSV threshold ranges.”
The results showing the eye colour distribution among attendees are displayed in a histogram.
This was Srikrishna’s first time using a Raspberry Pi, but he found the abundant online resources more than enough to help get the final project working within the short week-long deadline.
“[The project was] a resounding success; it ran without a glitch and worked as intended for roughly 350 visitors,” Srikrishna says. “The ML code was rigorously tested with datasets of human face images. The algorithms that were used are known for their high reliability (such as the Daugman algorithm [that] is used for iris recognition worldwide). The hardware was quite reliable; though I was initially worried, our Raspberry Pi didn’t overheat. The push-button connection was fairly simple, so once connected properly, there were no hitches along the way.”
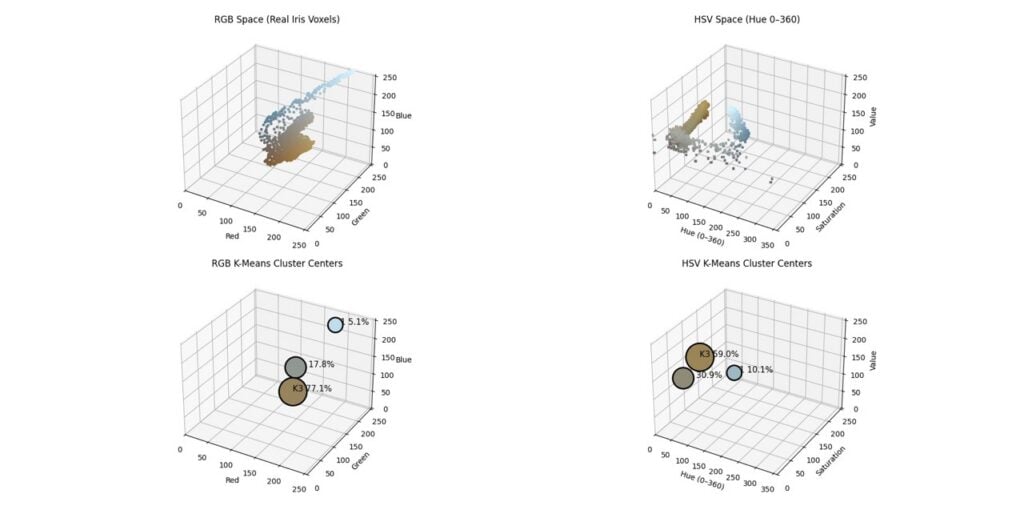
Srikrishna notes that clinical applications of computer vision and machine learning have become popular recently, and this project can be modified to benefit that.
“The plan is to upscale the computer vision code for diagnosing cataracts and various kinds of fungal infections of the eye,” Srikrishna explains. “We have a small team of enthusiastic students working on this since the last three months and would love to be joined by interested folks who’re reading this article.”
Srikrishna would like to thank Dr Prasanna Katti (Principal Investigator of the Muscle Physiology Lab) and the Science Day Committee at IISER Tirupati for approving the purchase of a Raspberry Pi and accessories for this project.
This article appeared in issue 168 of Raspberry Pi Official Magazine , which you can access online .
You can find Raspberry Pi Official Magazine on Facebook , X , Threads , LinkedIn , and Mastodon . You can also contact the team via email: [email protected]
Δ document.getElementById( "ak_js_1" ).setAttribute( "value", ( new Date() ).getTime() );
Specifications
- Primary Hardware
- Raspberry Pi 3 Model B+ 和 Raspberry Pi Camera Module 3
- Image Processing Algorithm
- OpenCV Haar 梯度分類器、Daugman 等式圓形梯度搜索演算法
- Color Analysis Method
- RGB 和 HSV 色彩直方圖、K-means 聚類
Sources
Specs and launch info are cited from official sources; the analysis is our own original writing.
In this project, Srikrishna Karthick used a Raspberry Pi and Raspberry Pi Camera Module 3 to build an iris color recognition system. His goal was to make the demonstration more engaging by automating data analysis.
The system primarily captures photos of the attendees using a camera. It uses OpenCV and Haar classifiers to detect faces and eyes. After a series of image processing steps, it can finally determine and display the distribution of eye colors among the attendees.
Although this was Srikrishna’s first time using a Raspberry Pi, he is very satisfied with the application of this technology. He plans to further refine the system and apply it in more practical scenarios.
Pros
- Cost-effective and easy to deploy
- Automates the data analysis process
Cons
- Requires certain programming skills for setup and maintenance
Discussion